photo 1-home-1.jpg photo 2-about.jpg photo 3-sponsor.jpg photo 4-faq.jpg
 photo header.jpg
Showing posts with label Craftiness. Show all posts

Sunday, 8 July 2012

DIY Instagram Collage


Aloha Sprinklerinos,

Once upon a time I lived in a stylish city apartment, with my delicious smelling boyfriend and we would spend Friday nights in swanky bars, laughing with friends and wearing shockingly high heels (me, not him!). Nowadays things are a little different. 

This Friday just gone, once Baby Glitter was in bed, I put on some cheesy romcom and grabbed my sellotape with relish. Forty minutes later and I had made this ::

 
Do excuse my fuzzy instagram pictures. Once it is hung I will photograph it with the cannon and we can all oooh and aaaaar. 

After I had instagramed the finished product, a lot of you sweetly asked how I made it so I have decided to tell you. It really was easy and is incredibly adaptable, so hopefully you can make something gorgeous for yourselves too. 


:: Step One :: 

Have your instagram images printed. I used Pinstagram for this. I opted for 2inch by 2inch squares and for $12 you can choose 48. They are sent in a little brown box on sturdy white card with a neat white trim. I LOVE them! I ordered multiples of a couple (like the one of me and my sister) so send in little cards- how quaint. At christmas, I intend on taking some cute shots of Baby Glitter, having them printed and using them as gift tags for family and friends. Delivery time took 2-3 weeks so plan ahead if you want to use this service. I was really happy with it. Also, as an extra bonus, you can pay by paypal, easy streets!


:: Step Two ::

Buy your frame. I bought this one from IKEA as I liked the raised edges. I also liked that it was only £7.99 and absolutely massive. Hurrah!


:: Step Three ::

The fun part- choose and arrange your photos. In this frame, if you squish them all up, you can fit 60 in perfectly. Since I had 144 to choose from, this was pretty tricky! Haha.


:: Step Four ::

Adhere your photos. For this you can use anything you like, but since I could only find sellotape, that had to do. Ideally a craft glue would have been more suitable. This particular frame came with a large sheet of fitted cardstock, so I was able to just stick directly to that. If your frame doesn't have one of these, you may need to improvise. Don't splash out, something as simple and accessible as cut out card from a cereal box will work beautifully. 


:: Step Five ::

Close the frame up securely and hang proudly. You are a craft genius and deserve a blue ribband or other such delightful treat.


This little craft project is great because it was easy, mess free, affordable (frame was £7.99 and 48 pictures were $12, so for the sixty in there it probably equates to about a tenner, entire project coming in at under £20) and can be adapted to so many things. Obviously you could make different sized and shaped collages, but you could also make birthday card, invites, or decoupage table tops. The possibilities are endless!

I'm really glad I took the time to print my pictures, all too often my memories sit unseen in digital form and so I am looking forward to finding more and more ways to display my growing love for photography.

Is this a project you might try? How do you display your pictures?

If you would like to follow me on instagram, I am 'Sprinkleofglitr', just like my twitter handle.

Toodlepip!

xx


This month my Ultimate Advertiser is Confessions of a Secret Shopper. If you would like to know more about advertising on Sprinkle of Glitter, check out my 'Sponsor' page up at the top!

Friday, 22 June 2012

Gift Ideas for Dashing Dad's


Aloha Sprinklerinos,

All my life I have struggled with buying gifts for men. This Father's Day I did myself proud though. So proud, I'm going to share my idea with you. I should probably point out at this point that it was my friend Marie's idea, but seeing as she lives on the other side of the world in America, I don't think she'll squeal on me any time soon! 

 (I have editted the flower over Baby Glitter's chest because naturally I don't want her topless on the internet. In real life, that's not there! Matt was THRILLED with his gift and can't wait to hang it in his study.)

How to make this Dashing Dad's Gift

1. Think about the word you want to use and buy the correct frame. I wanted 'D.A.D', so I only needed a tripple window frame (mine was from Ikea). 

2. Buy the letters you need to make the word and paint them the colour your choose. I used some paint I had in a little B&Q tester pot, so you really don't need to be Mrs Fancy here. 

3. Get snap happy! I dressed Baby Glitter in a little tutu and pink bloomers, sat her on a blanket which I held up behind her, whilst Zoe clicked away. You may have to take a fair few shots (especially with young children and babies) but hang in there and be patient. If possible, ask a friend to help because it makes life so much easier! Thank You Zoe! 

4. Take your snaps to the developer and frame. Simples. 

: TIPS :

Try this for the Christmas season but with 'J.O.Y' or 'N.O.E.L' and a festive outfit. You don't need a baby/child for this, I made one for my Dad with these photographs. Don't I look spiffing?! Haha.

Buy a double windowed frame and hold numbers to make a unique birthday gift. 

Use a four windowed frame for words like 'LOVE', 'LIVE', 'LUCK', 'BABY, 'HOME'.

To make photographs look extra swish, consider using a free photo editting site like picmonkey. You don't need a professional camera to make brilliant images, just a bit of creativity.

If this was a gift from children, buy a simple frame and allow them to embellish it with gems, paints, buttons or sparkles.

HAVE FUN!

Is this an idea you like and might try? Do you have any great DIY ideas for the menfolk in your life? Share the love. 

Toodlepip!

xx

PS- I am now on Pinterest and you are welcome to come and snoop through my boards/follow me. Go on, you know you want to ;)

This month my Ultimate Advertiser is Dashing Divas. If you would like to know more about advertising on Sprinkle of Glitter, check out my 'Sponsor' page up at the top!

Saturday, 16 June 2012

Fantastic Father's Day


Aloha Sprinklerinos,

As tomorrow is Father's Day and I have a love of crafts, I decided to put my creative hat on and make something rather marvellous for both Matt (from Baby Glitter) and my Dad (from me, obviously).

I won't show you the finished product yet because despite saying they don't read my blog, it would be Sod's Law that they read it tonight and spoilt the surprise.

So here's a teaser....


I know it's a bit slushy but I really don't know where I'd be without my Dad. Aside from orphaned of course! He is always on hand when I need advice, supports me in all my mental little ideas and projects and knows all that 'Dad stuff' like what to do when you smash your car up or how to arrange life insurance. How do people learn that kind of thing?! They really should teach 'life' lessons in school.

If you are lucky enough to have a good Father in your life (and I appreciate that not everybody is), then don't forget to tell him you care, I bet he'll be glad to hear it. Men are emotional deep down. 

What have you done for your Dad this Father's Day? Can you guess what I made? You'll have to wait and see...

Toodlepip!

xx

Monday, 28 May 2012

How To Make A No Sew Tutu


Aloha Sprinklerinos,

Last week whilst focusing on achieving little goals to make me smile, I aimed to see a craft project through from start to finish. Surprisingly all round, I actually did it. Go me!!

I decided to make Baby Glitter a multicoloured tutu, but unfortunately, my proportions were a little out of sync and so now it is more suitable for my friend's six year old Daughter. I'm not too worried though as it will make a lovely birthday gift and I have plenty more fabric to make Darcy one too- hurrah for buying too much! Haha.

How_to_make_a_no_sew_tutu
The first thing you should know about this project is that it is NOT HARD. It is quite possibly, the easiest thing you could ever want to make in the garment department. There was no sewing, no interfacing (I know it's game over if there is interfacing involved) and no pesky pattern to follow. If you can use scissors and tie a knot, you can make this.

No_Sew_Tutu

Want to know how? Let's go!

1. Cut a length of elastic to the size of the waist. I used knicker elastic from Hobbycraft. Tie it in a circle.
2. Cut strips of netting. Mine were about 40cm long and 15cm wide but you can vary yours to suit.
3. Loop each strip over the elastic and pull it through tightly to secure it. 
4. Repeat all the way round until your tutu is as full as you want it to be. 

Tips!

The more strips you add, the 'poofier' it will be.
You can sew on sequins or glue on crystals, but do bare in mind that tots are like hungry magpies and may attempt to remove and consume. Make sure they are secure.
I tied a navy bow on the front of the skirt, just to add a finishing touch and differentiate front from back. It's Jazzy, non?

If you are struggling to find netting (I bought mine in a little craft store in Liverpool but was REALLY unimpressed with the selection I found in Hobbycraft, John Lewis and my local market), THIS ebay seller provides every colour under the sun for only 99p per metre- Bargain! To give you some perspective if this is your first tutu time, the skirt above used 1.5m of netting in 3 different shades. So half a metre of each.

I'm so glad I made time to be a bit creative and fulfill my makey makey urges. I can rest easy for another week!

Are you creative? What sorts of things do you make?

Toodlepip!

xx

This month my Ultimate Advertiser is Laura from Secret Diary of a Fashion Journalist. If you would like to know more about advertising on Sprinkle of Glitter, check out my 'Sponsor' page up at the top! 

Friday, 30 March 2012

Lou's How To's :: Birthday Wreath


Aloha Sprinklerinos,

A couple of days ago I instagrammed ('Sprinkleofglitr') a picture of something I had made for Baby Glitter and I had so much interest in it, that I thought I would write a blog post for you all.


This is the image in question. It is a Birthday Wreath made for Baby Glitter's upcoming 1st Birthday Party and it was beyond easy to make.

My friend Marie in America had made one for her little girl's birthday bash and I instantly fell in love and decided to make my own. You can check her video out HERE to see all her gorgeous party decor.

I shall give you a step by step and ebay links for crafty bits if you like to order online. Alternatively, you could pop along to your local craft store. I just like ebay because it's easy, speedy and paypal friendly- ohhh yeaaah!

Steppy by Steppy's:

1. Get yourself a polystyrene ring, a ball of wool in whichever colour you prefer, about 50cm (to be on the safe side- you may have excess) of ribbon in whichever colour you prefer, stick on gems, scissors and most fun of all, embellishments!! You can go wild with whatever you would like, but I chose cupcakes to give it a birthday feel.

2. Wrap the wool around the ring. For a more full and plush appearance, wrap round a couple of times. Warning- this takes time! Sit yourself in front of a film and just enjoy the easy task and feel satisfied watching it slowly fill up.

3. Wrap the ribbon round the ring to give it a candy cane spiral effect. Tie a bow and loop at the top so that you will be able to hang it from a hook.

4. Add the embellishments in any pattern or design.

5. Add the stick on gems in any pattern or design.

6. Stand back smugly in the knowledge that you just made a Birthday Wreath.

Seriously, this is an easy peasy lemon squeezy project and could be adapted for any occasion. How nice would an Autumnul wreath look? Mmmmm, I love Autumn.

I plan on displaying this near Baby Glitter's highchair at her party so that it is in a lot of her photographs and then afterwards I will hang it in her bedroom. Maybe we'll get it out every year!

If simple pimple baby projects are your bag, last year I wrote a post on customising baby clothes with pens and waaaayyy back in 2009 in my first ever month of blogging, I wrote a post on making a tutu for a barbie doll. Craft-tastic!

Is this something you might try? Do you think it will make a unique decoration?

Toodlepip!

xx

Saturday, 3 December 2011

Christmas Crafts :: Inspiration

Aloha Sprinklerinos,

If, like me, you have a somewhat unhealthy obsession with crafts, glitter and handmade trinkets, Christmas really is the most wonderful time of year.

If you can't throw sequins on something and call it 'customised' at Christmas, when can you?


I think I have mentioned in a previous post that I have a few Christmas craft tutorials up my festive sleeves for you, but before that, I thought I would share on of my favourite Christmas things with you.

Every year, about October/November time, when the festive itch scratches, I start to look at homey magazines. Throughout the year I'm a More, Reveal, Look, Glamour kinda gal, but come winter, I start to feel a real need for this 'grown up' magazines, with their tips for good housemaking, recipes and craft tutorials.

Over the years I have racked up a few of these Christmas edition magazines. I'd suggest if you buy one, to keep it til next year because lets face it, a brushed felt robin decoration is going to be the same in 2011 as it is in 2017, non? Also, they usually retail around the £4-5 mark, which for a glossy mag, is pretty pricey I think.

I really love flicking through these. I always try some of the little projects (and sometimes fail- I actually made a video last week on how to make a 3D Chocolate Crispy Tree, but it was a total disaster and never made it to YouTube!) and always take decor inspiration from them.

I urge you to don your hat and scarf, skip down to your local news agents, grab a bag of maltesers and a Christmas magazine and immerse yourself in the festive cheer of it all.

What do you do to get yourself in the Christmassy mood? Also, I feel like I've typed the word 'Christmas' about 5,000 times!

Toodlepip!

xx

Saturday, 26 November 2011

A Sorting Saturday

Aloha Sprinklerinos,

Baby Glitter is rolling around at my feet (on a blanket with toys I might add, she's not just been slung down there and ignored! haha), Mattmoo is watching Sky Sports News (gad zukes I hate that channel) and I'm pootling around on t'internet.

I know I've already blogged today, but I haven't filmed or uploaded any videos because of this horrid fluey thing, so I'm feeling blogtastic.

What's happened today then?

*I lugged all the junk out of our cupboard under the stairs and we (by 'we', I mean 'Matt whilst I pointed at stuff and tried to look busy') moved it all to the garage, where I can forget it exists and not deal with it at all. The aim was to then put other, more relevant junk -hoover, pram, ironing board, the obligatory bucket that every household has and wonders why etc- under there. Now our dining room is less full of junk. Essentially, it was all just a big exercise in moving junk from different places and feeling better for it.

*We took a few bits to the local tip, where we were met with the most helpful (please sense the sarcasm there) man ever.
Matt drives up. Tip man signals at us to stop and wind window down.
Matt- Looks questioningly at Tip Man.
Tip Man- Stares back.
Matt- Umm...I want to chuck out a big rug and an old tent.
Long weird pause.
Tip Man- One 'n' Two.
Matt- ...........thanks then.

*Despite Matt saying he hates Hobbycraft, I made him come in with me on the premise that I'm poorly and deserve to be mollycoddled. I bloomin' love that place. I actually only wanted to buy some star shaped cookie cutters, but got a bit carried away in the bead department. Woopsie.

Is it weird that I spent quite a lot of time swilling my hand around this bowl of beads? I like to do that with chestnuts in supermarkets as well......like a normal person.

*We accidentally bought a McDonalds, parked up near a nice grassy area and housing estate that we love. We play this game where we look at the street of houses (not in a pervy casing the joint way, in a nice way) and say that when we win the lottery we'll buy the whole row and put all our friends and family in them and decide which houses each person will get and why.

*We came home, gave Baby Glitter her lunch, let her have some story time and I tweeted, fb chatted, did a bit of blog research, answered emails and texted back a few people. Technology attack!

* Whilst mooching around (I do love it when Matt's at home, I can mooch mooch mooch) my online favs, weheartit, etsy, ebay and folky, I came across a tres cool ebay shop. I wanted to include it in my Ebay Hearts post, but I really cannot wait, and to be fair, it doesn't really suit the theme I'll be going for.

Beauty Makeup Supply Jars & Bottles


THIS SHOP is a beauty addicts dream! It sells EVERYTHING storagey (real word there) and oragnisey that you would ever need. It has jars, tubs and atomisers to decant products into- perfect if you like mixing products or travelling. It has mascara wands, powder puffs, foam wedges and sponge applicators- perfect if you are a makeup artist or your friends use you as one (like mine, hmmm). It even has a 3 tier 24 slot acrylic lipstick holder (HERE) which I'm seriously considering.

I hate to sound so thrilled about jars and organisers but things like that really float my boat. I've had so many requests for a makeup collection video but really desperadosly need to sort my cosmetics drawers out before I unveil them to the world!

*Hmmm since starting this post, Baby Glitter has had her dinner and gone to bed and Mindy is attempting to sit on my shoulder. Looking forward to a cheesy omelet, Saturday night TV and uploading this week's London photos. And do you know what, I'm not in the least bit ashamed that 5 years ago I was probably drinking cheapo vodka, straightening my hair and setting off on a crazy adventure with my friends and now I'm snuggled up with a blanket, the cat and my laptop...........well, not much anyway.

What have you done today? Do you love that shop as much as I do? Am I a fruitloop? Don't answer that last one!

Toodlepip!

xx

All pictures aside from the ebay store one wear taken on Matt's phone. Hope you can actually see them now, after that slight technical hitch!

Saturday, 29 October 2011

Graffiti Baby


Aloha Sprinklerinos,

Bit of a crafty post for you today (and a few titbits of news too later on) because when the nights draw in and everything becomes more cosy, like a moth to a flame, I'm drawn to my sewing machine, glitter glue and other crafty projects. For the most part, they end up half finished and shoved under the stairs, but the ones that graduate to finishing stages, get aired on Sprinkle of Glitter, in a bid to provide a bit of inspiration and interest to you lovely lot.


A few weeks ago, whilst I was having a funny turn in Topshop, I picked up THESE Graffiti Pens for £6.50. Now, I'm not trying to do Topshop out of a service here but I do actually think £6.50 is a little steep and since I'm having a small love affair with ebay at the moment, I found some cheaper HERE. (By the by, would you like a post about my new love for ebay? Let me know because I'd love to write about it but don't want to bore you! Haha)


So, with my new crafty toy, I got to thinking "What do I want to customise?". I love customising things but truely had nothing of my own I wanted to take ink to. Also, I was a little worried that with my lack of artistic flare, I would really ruin an item of clothing and then regret it forever!

I needed something small, inexpensive and that would only require basic skills. A baby vest!! Baby vests can be bought cheaply from supermarkets, baby stores, anywhere- and I have an abundance of them. I figured this was a low risk project and relaxed.


I opted for technicolour dots because the nibs of the felt tips were a little rough and dragged on the vest's thick cotton. I think this would make it a bit tricky to do anything really detailed or sophisticated, which is a shame.

I'm ever so sorry for this craptastic picture, it was pretty last at night and lit by the fairy lights on my bed, but this was the effect me and my felt friends created:


No, it's not a masterpiece, but it was fun to do and with little baby jeans and a bright cardi, I think that will look pretty cute.

I'd quite like to jazz up some bibs and burb cloths too. I think I might get these babies out closer to Christmas and draw a few little trees, robbins or gifts on tea towels to cheer the kitchen up a bit. They might be nice to personalise little presents for people too. Ooohh lots of ideas now!

All in all, it was a super simple, easy, fast, fun project, but I think I would rather have paid the ebay prices than £6.50 for these, as it was a bit tricky to get any detail or do much more than simple designs.

Craft-tastic!!

Are you a craft projects kind of a gal? Are you into customising?

Toodlepip!

xx

PS- A few bits and pieces-

I'm currently having a bit of a thing for ebay- do you want to know more?

Mine and Zoe's Secret Venture is getting closer and closer to unveiling...eeeeee I'm excited!!

I bought skinny jeans! Yes, me!! Skinny Jeans!! I've made a video which I'll upload soon with you all!!

My Glitterbits package to Marie is almost packed and ready to go, I can't wait to see that either! Woop!
Ok, you're up to speed. Toodlelou! xx

Sunday, 23 October 2011

Snuggle Time

Aloha Sprinklerinos,

If, like me, you love Autumn, being cosy, handmade things and shabby chic girliness, then today's blog post is for you!!

Whilst I was pregnant with Baby Glitter, my Auntie Judith and I chose some beautifully pretty fabric. We bought it because Judith is a dab hand at sewing quilts and I was thrilled when she offered to make one for Baby Glitter's cot.


Due to a few lifey issues getting in the way, the quilt didn't quite make it in time for Baby Glitter's birth, but who needs a huge cosy quilt spring-summer? Not I. :)

With the chill of winter fast approaching, I was pleased as punch when Judith presented me and Baby Glitter with this gooorrgeous patchwork quilt. It is brushed cotton on top and fleecy on the underside. Blissful.


I hope Baby Glitter keeps this forever and it brings her great comfort in all the cold moments of her life.


Next up, a gifted item. My chum Marie from America, sent me these lovelies. They're baby leg warmers and are apparently all the rage in the States. I have never seen them over here in the UK, all similar things seem to have a gusset. Now, there's nothing wrong with a gusset, but when you are a baby and have regular nappy changes, a gusset can be pretty annoying. On Autumn days, when it's that inbetweeny weather and too warm for thick tights, but too cool for bare legs, these are PERFECT! If you like layering your baby, these are your pals. They're also really good for little knees learning to crawl on carpets/blankets/beds (yes, she is determined to chuck herself over the edge!).

I haven't found any in shops round these parts, but there are some really good ones on THIS ebay shop, for only £2.95 and FREE P&P. I think that's a snip and would make a lovely little stocking filler or baby shower gift too. I may stock up!

Do you remember my chum Yin Yin who made me a cerise cushion two years ago (if you are a super sprinklerino and have been reading that long!)? Well, she came up trumps once again and crafted this beautiful woollen blanket. It's the perfect size for Baby Glitter's pram and even more ideal for laying on the lounge floor and encouraging her rolling/crawling skills. Also, the slight OCDness in me is pleased that it matches the baby leg warmers. Haha lame.


Yin Yin must have spent so much time on this. Can you see the heart detail? I heart her very much indeed for creating this. I think there is something so special about handmade gifts.


This cable knit cardi was a gift from Matt's Aunt Patricia. It is uber soft and I love the peach petal shade. To be honest, if I saw this in my size, I'd be tempted! Cardigans are the perfect little add on to Baby Glitter's outfits and I always have a clean spare in her nappy bag, just in case.

And here is the little munchkin, in her Mini Mouse PJ's, ready for her morning bottle.

What are your Autumn snugglies? Are you a layering lady?

Toodlepip!

xx

Friday, 11 March 2011

Lou's Lovelies :: DIY Applique Personalisation

Aloha Bloggerinos,

It's been a loooonnnngg time coming, but I thought I'd throw a crafty post out there, since we have had so many beauty related things in the last few months. I go through phases with crafts, I have to be super in the mood to get my sewing machine or glue gun out and for the past few months I've felt a little bleaugh towards it all. However, this little project was so quick and easy, it didn't seem like a chore- woop!
Anyhoo, a few weeks ago, whilst in Hobbycraft, Matt spotted these cute little letters for £1.25 each. They had girlie ones and boyish ones, every letter of the alphabet. We picked up her initials and I decided that I would have a hunt for something to personalise for her, just to jazz up her stash a bit and make something a bit special.

Little moan here- I just saw the website in the photo, looked it up and saw that you can actually buy individual letters for 70p, which is a lot less than £1.25!! Naughty Hobbycraft!


I attached the letters to one of her shoulder cloths because I know I can hang the motiffed part over my back so it doesn't scratch her face at all and I thought it looked a little plain. Other applique contenders were blankets, muslin squares, little tops or towels, so it goes to show how versatile this project is :)


It was beyond easy! I positioned the letters where I wanted them, dampened a different cloth (I just used a muslin square as it was to hand), popped the damp cloth over the letters, ironed it thoroughly for about 15-20 seconds, removed the iron and damp cloth and voila!


I really think this is something I would like to do more of, not only for Baby Glitter but I also think it would make a unique gift for other mummy friends or relatives. I think this is ideal for someone like me who is now pressed for time but still has the urge to craft and customise :)

Is this something you might try?

Toodlepip!

xx

Wednesday, 16 February 2011

'Hello there Mr Butterfly, how nice of you to flutter by'


Aloha Bloggerinos,

A few days ago I was contacted by new and upcoming jewellery designer who asked if I would like to see some of her work. I had a look on her website, chatted to her about her inspirations and materials and felt it was something that you snazzy Bloggerinos would definitely be interested in.


Lucy of www.lucymaydesigns.co.uk has designed a whole host of items from bridal bodices to bracelets and hand makes them all using machine embroidery, swarovski crystals, glass beads and pearls.

Lucy takes her inspiration from looking at historic wedding garments and enjoys to base ideas on paisley patterns, bees, hearts and flowers.

I was kindly sent a butterfly hair clip that I think is very well made and a lot of time and talent has clearly gone into it. It's purple with a green iridescent shimmer and is adorned with purple sparkly threading detail, tiny black beads and gorgeous sequins. I also like that is has a bit of movement to it, in that the wire has been manipulated to make it a bit more 3D, rather than being flat as a pancake.


A very well crafted piece that I am glad to add to my collection and urge you to go and have a look at her WEBSITE, not just to see what pretty and unique pieces you could pick up, but also because I think it's great to support young British designers rather than always lining the pockets of bigger corporations (although I am guilty of this too! haha).

Have you had a look? What did you think?

Also, I have uploaded a new Curvy Girl OOTD on YouTube, which you can view HERE.

Toodlepip!

xx

Sunday, 14 November 2010

Merry Breakfast One and All

Aloha Bloggerinos,

Today I have put a festive twist on my usual breakfast cereal. I have replaced the cereal with mince pies and the milk with double cream, mwhahahahaha! I am sooooooo game for Christmas! Being the kind owner I am, I offered Mindy some cream but she looked disgusted. What kind of a cat doesn't like cream?? I was all set to make witty remarks like "Oh she looks like the cat that got the cream" etc, but no, I was robbed.


This week, since we last spoke at least, I have been continuing with my Christmas Crafts and made a whole host of christmas cards, some christmas stockings, some big fabric hair bows for my sister (she actually requested these about six hundred and twenty years ago but I'm only just getting round to it-woopsie), notelet packs, bracelets, christmas tree decorations annnndd that's about it. Which, if any, would you like to see tutorials for?

On Thursday my Auntie Judith took me to the most amazing fabric place EVER. It was like material heaven and I nearly did a little wee in my maternity jeans (never going back to regular ones now) I was so excited. I was quite restrained though and bought a couple of fabrics to make teeny weeny skirts on my sewing machine and a couple of really soft quarters to make pretty burp clothes. I know she'll only sick up on them but they'll be nice for special days out etc. I'm hoping to get good at little skirts for her, that will go over tights and body suits and then make loooaaadss. I have tonnes of lace and rick-rack to embellish so I'm pretty excited!

I'm in the process of making a few more flower rings as these went down a bloomin' storm last time.

Well that's all for now, enjoy the festive snap courtesy of googleimages.com.

Toodlepip!

xx

Tuesday, 9 November 2010

Christmas Crafts :: Fabric Brooches/Corsages

Aloha Bloggerinos,

With Christmas around the corner (46 festive nights away to be precise), Santa (aka, me) is busy busy in his workshop, crafting all sorts of lovely gifts.

Photobucket

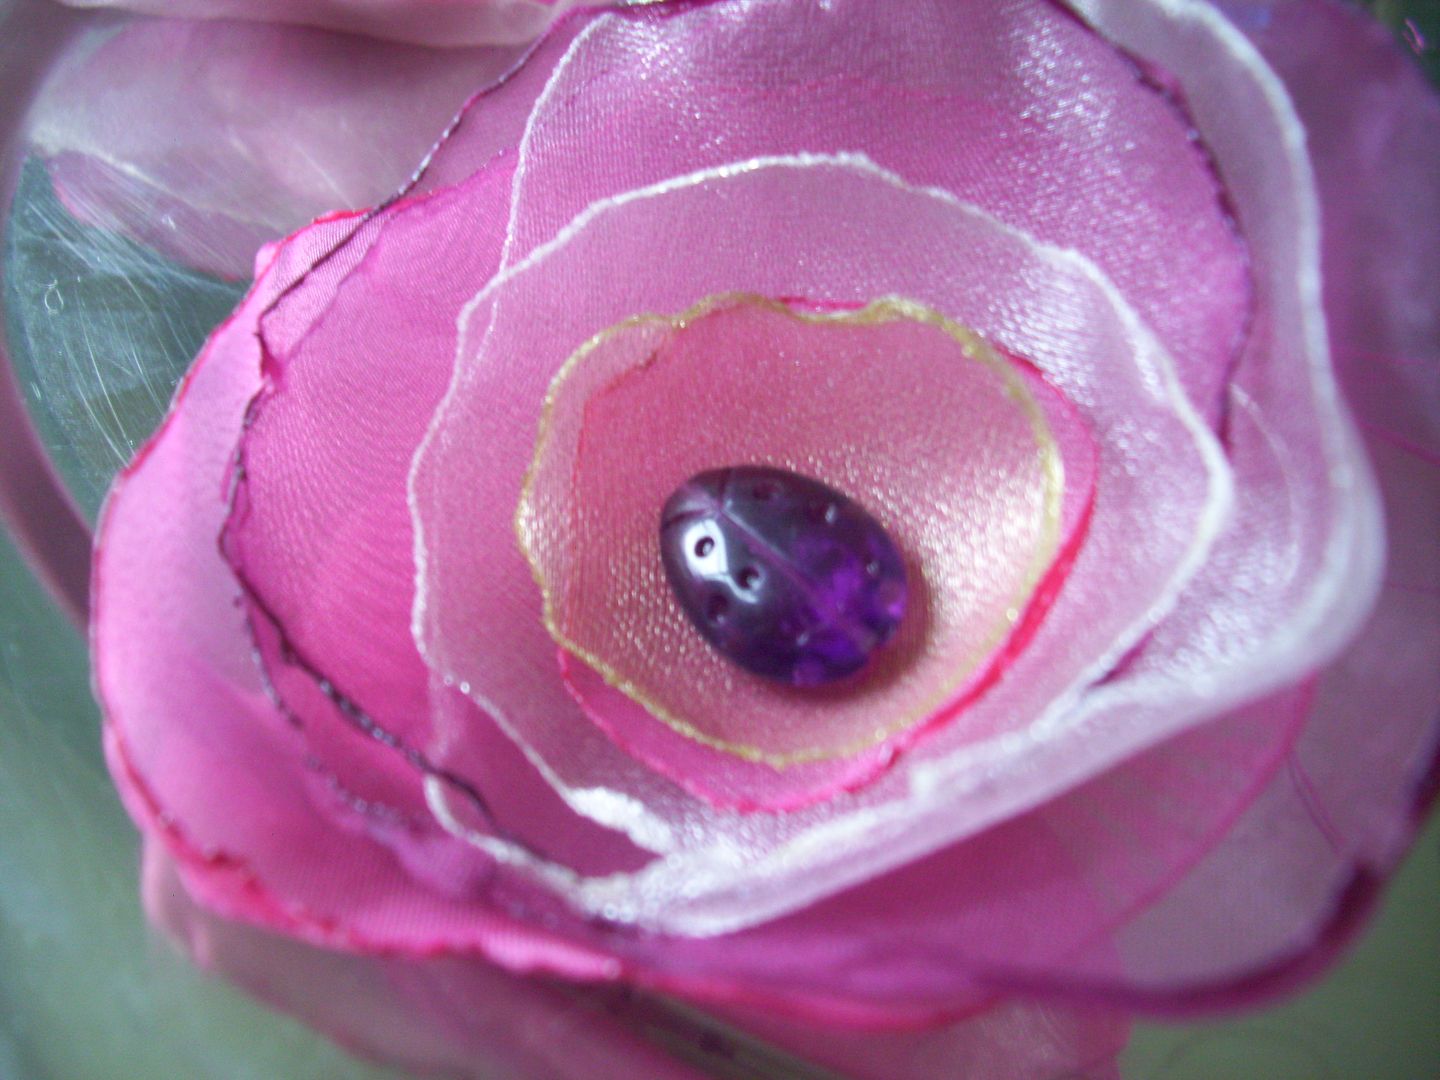
These corsages are so easy to make and require very basic sewing skills.

What you will need:

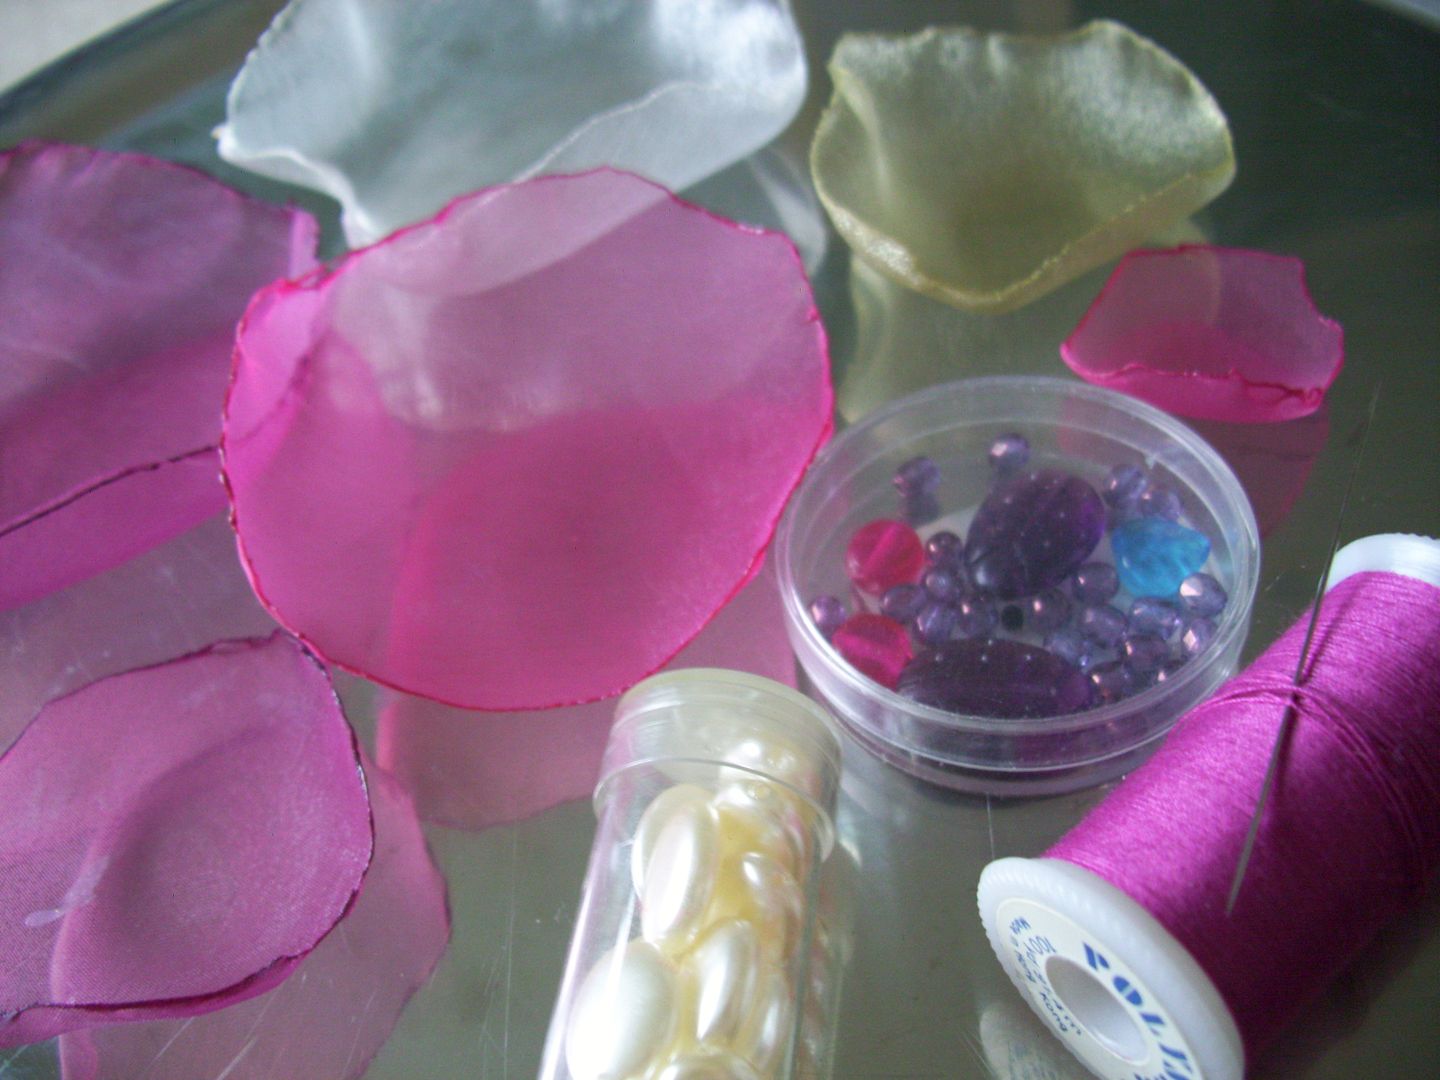
1. A few different colours of synthetic material. It HAS to be synthetic to make the edges curl, more on this later. I picked my sheer organza type fabric up from a place called Abakhans in Liverpool. If you live in scouseland, I strongly suggest you check this place out. It's an Aladdin's cave of bargainous craft stuff, everything you can imagine :)

2. A candle and matches/lighter.

3. Scissors.

4. Needle and thread.

5. Safety pin or brooch back. (I used a safety pin as I had these to hand).

6. Embellishments. I used assorted glass beads and a few flat faux pearls. You could use buttons, sequins, beads, stick on gems or anything jazzy that you can get your hands on. Don't go crazy spending money if you can't, this is the perfect opportunity to use the bits of that broken necklace or old buttons.

Photobucket

How to make your corsage:

1. Cut out varying sizes of circles from your materials. The more circles you use, the fuller your brooch will look. I usually go for about five circles, but it is entirely up to you. Cut the circles by eye, you're going to be curling the edges so no need for total accuracy here.

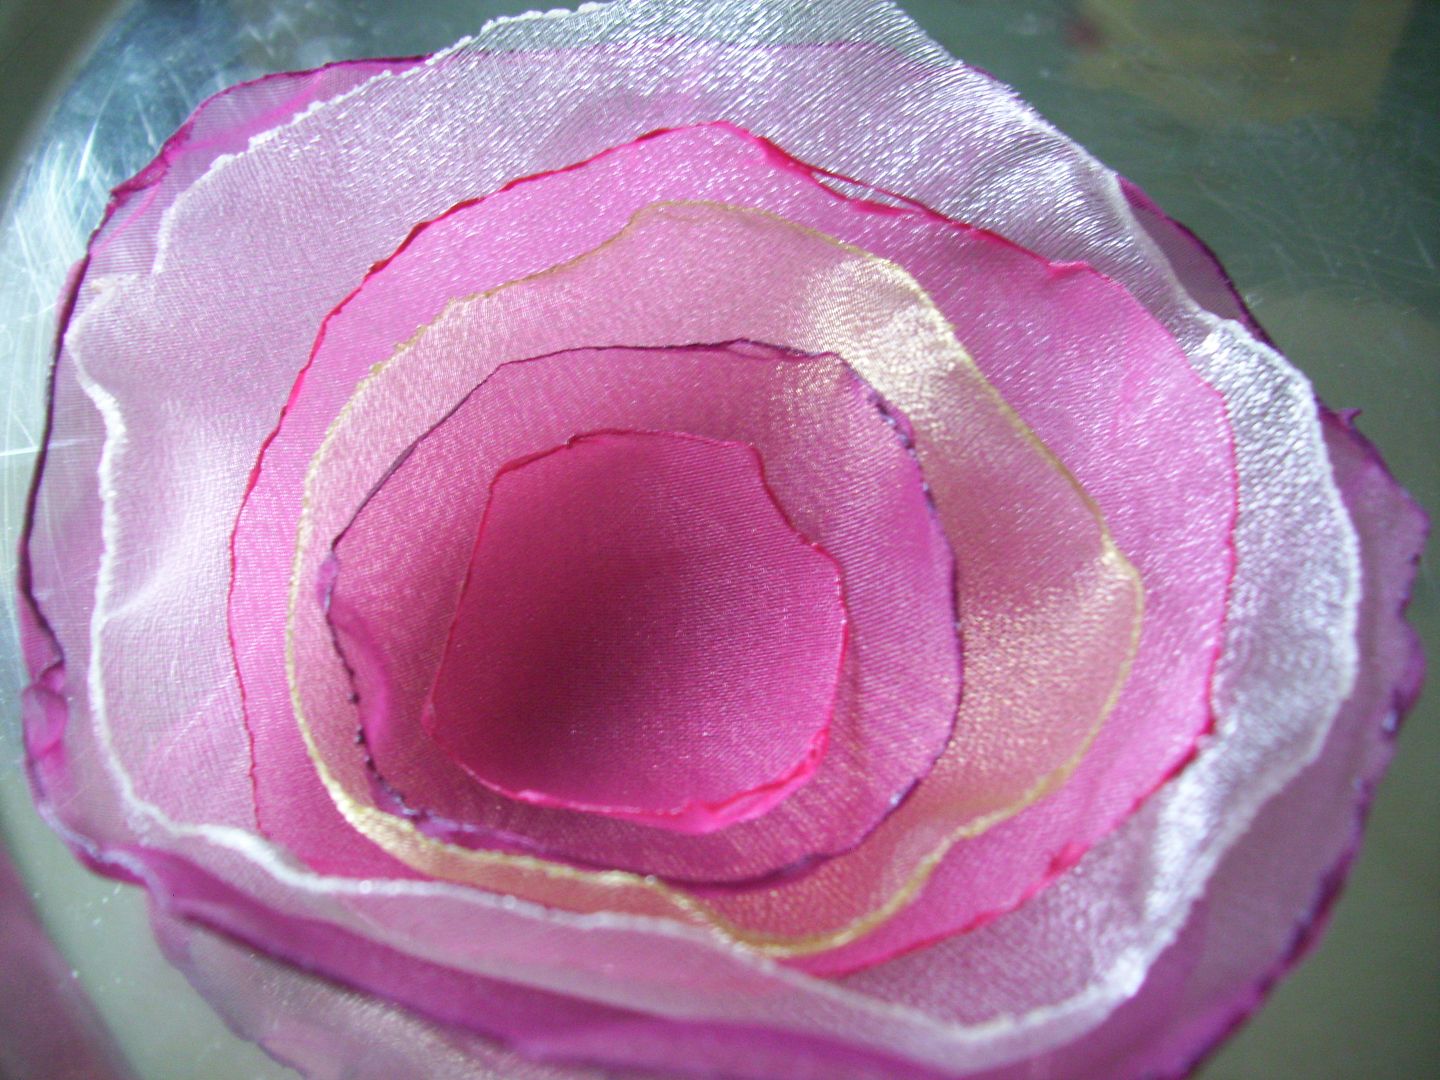
2. Melt the edges of your circles over a lit candle. This is quite easy but its best to have a couple of trials first. You want to just run the fabric through the flame to create a curled edge and enhance the petal-like effect.

Photobucket

3. Stack the petals on top of each other in size order until it looks how you want it. It should now look corsagey.

4. Using your needle and thread, pop a few stitches through the centre of the corsage to tie all the petals together.

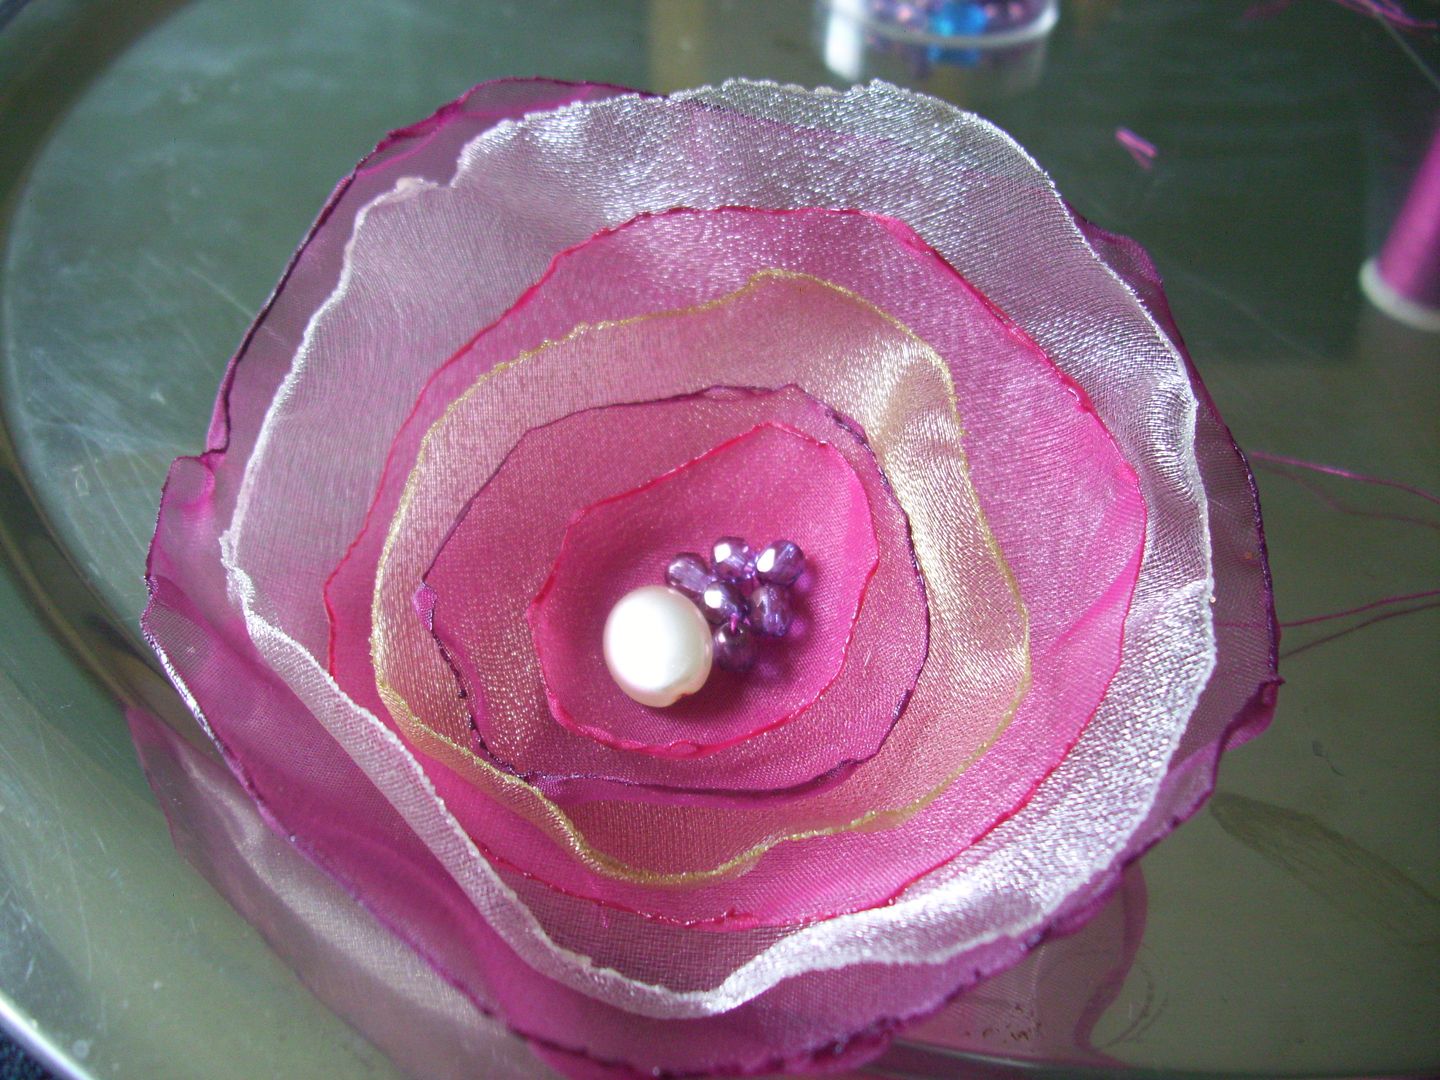
5. Sew/glue on your chosen embellishments.

6. Sew/glue on your safety pin.

This project is great as it's so versatile and can be kept basic for beginners or jushed up a bit for a more advanced crafter. You can go to town with embellishments, colours, layers and textures. Why not incorporate bows or feathers?

Photobucket

These will now be carefully wrapped, sent to Father Christmas and dropped down my Aunties chimneys. Lovely.

Is this something you have, or might in the future try? If you have any questions, do let me know :)

Toodlepip!

xx

Thursday, 4 November 2010

Christmas Crafts :: Chic Garland


Aloha Bloggerinos,

With winter well and truly here (as I type, my windows are about to be blown in by gale force winds and also, veering of course a bit here, my 60 something year old neighbours are having some shockingly loud 'couple time' if you get my jist- erlack), I felt it time to crack open the craft box and get busy.

As previously mentioned, I am currently rich in time but poor in mula, so this Christmas is going to be inspired by vintage, handmade and upcycling- very fashionable dontchya know? I've set myself the challenge of using up all the copious supplies I have and will not, not, NOT go to HobbyCraft under any circumstances!!

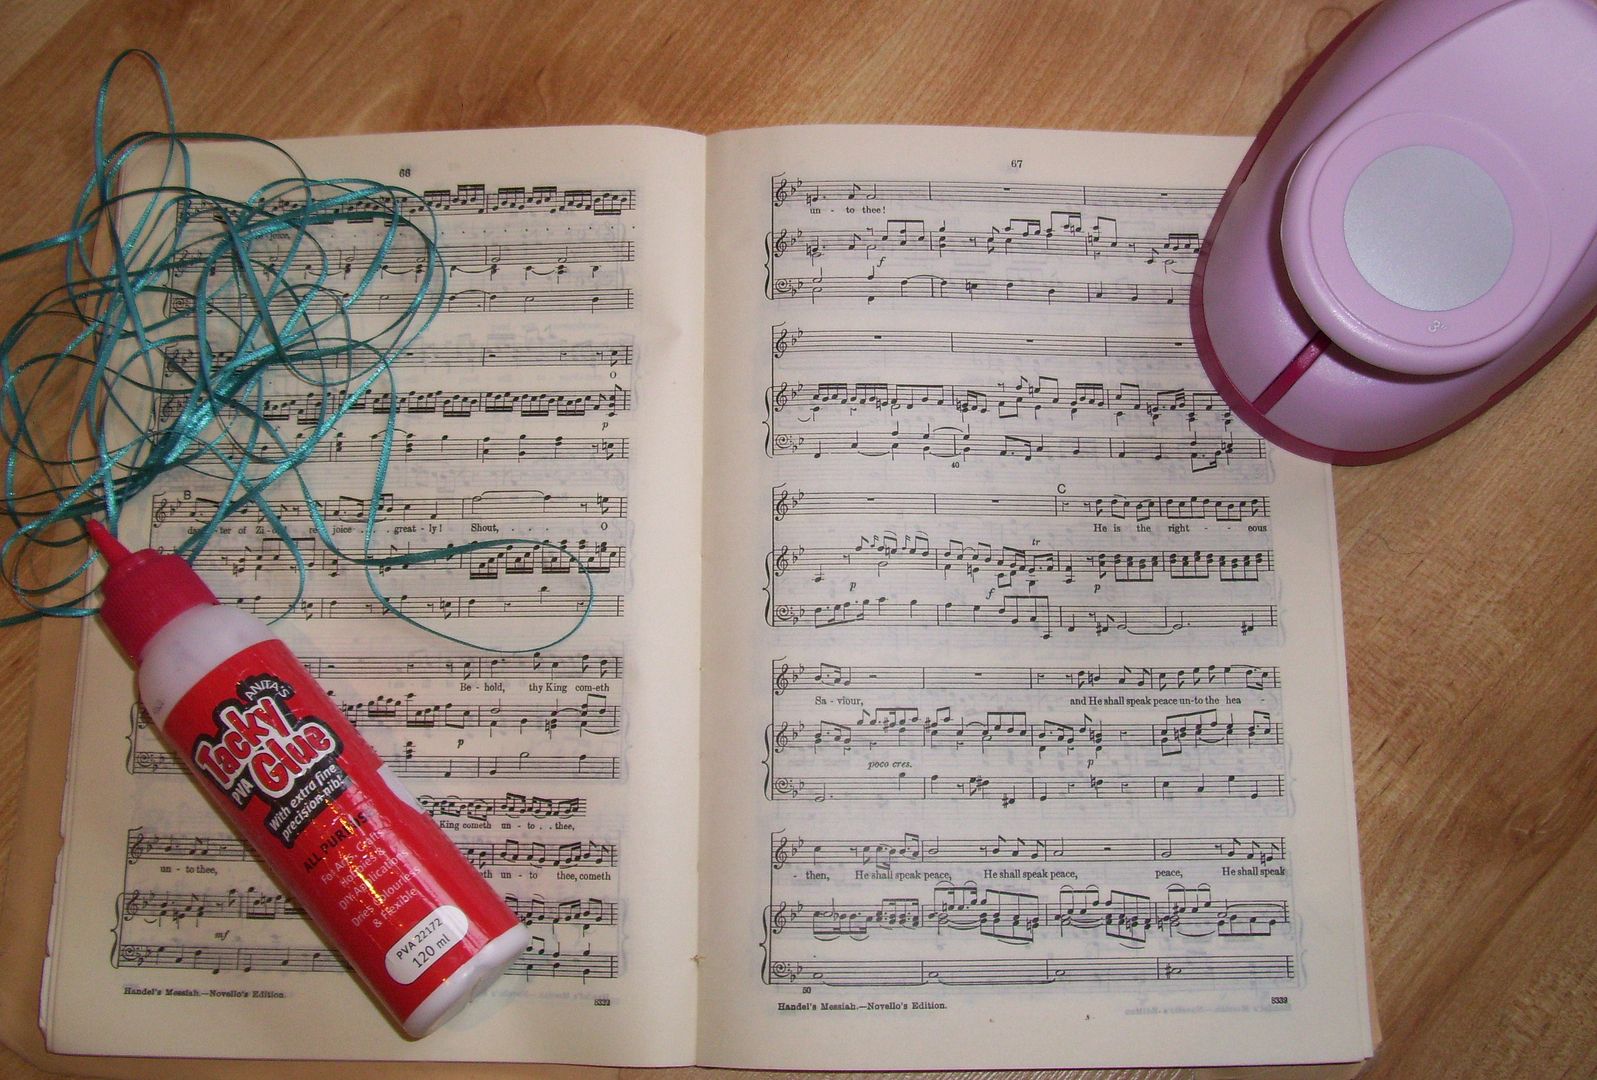
So, one of the first things I have made was inspired by my Ideal Homes (I think) Christmas magazine which Matt bought me at an M6 service station, I do love that man. Basically, it's a paper garland that you can adapt to however you like and hang pretty much anywhere- versatile oui??

I would described the skill level of this project as- superduper basic. A monkey could do it I would think.

Photobucket

What you need:
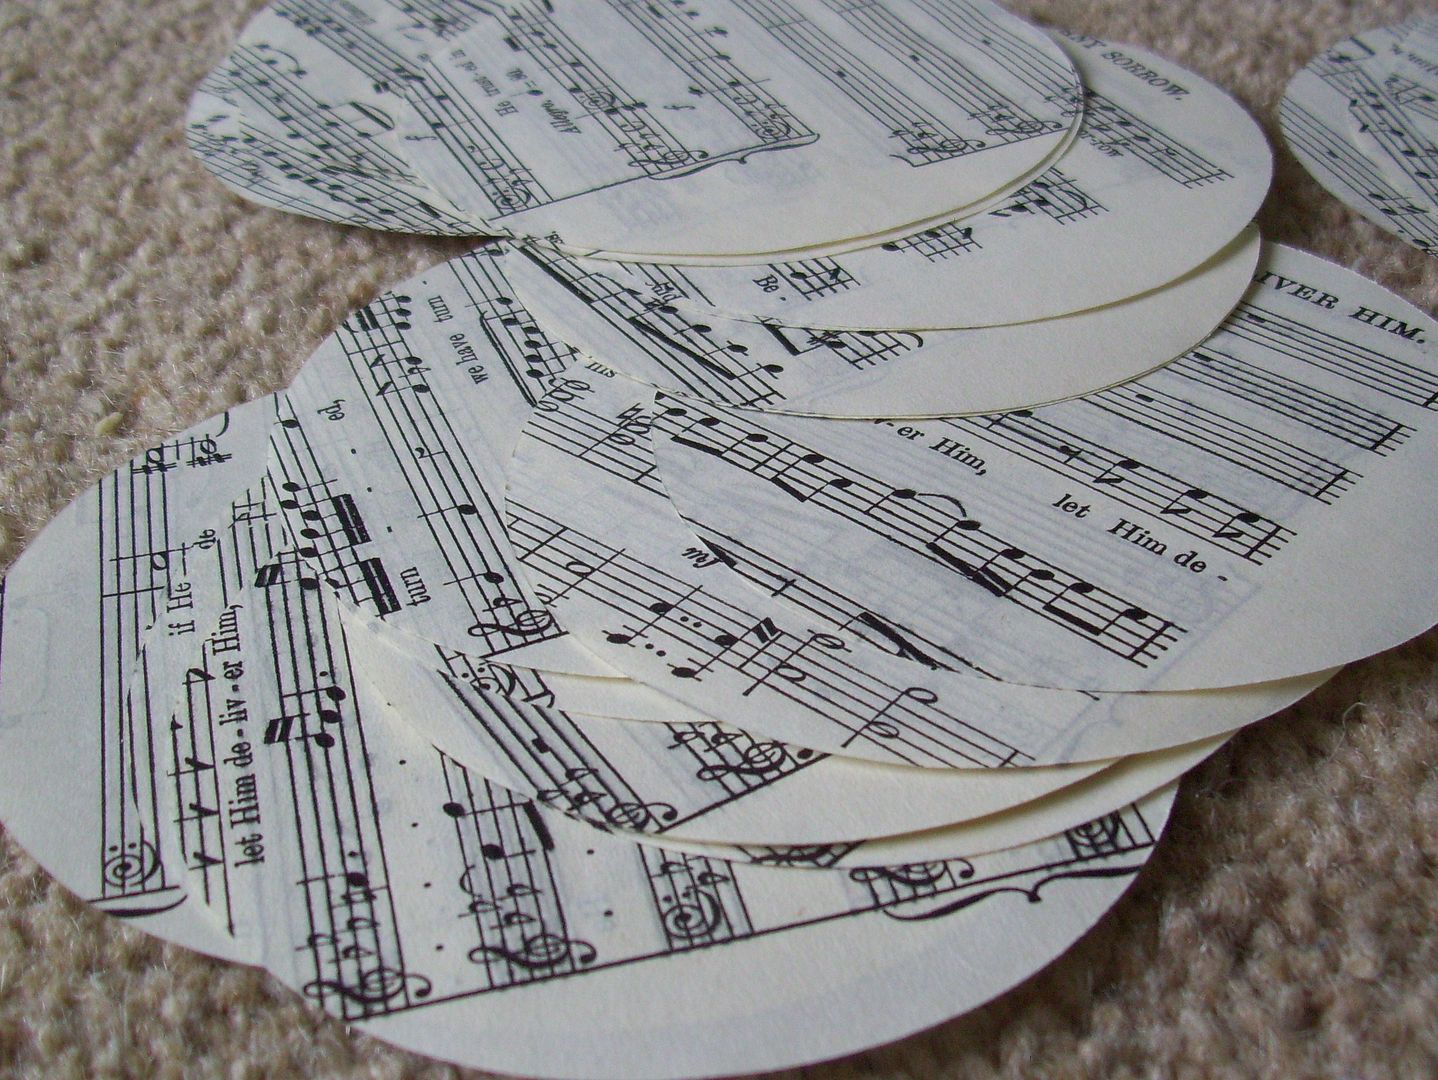
1. Paper. I used paper from a music book jobby that I bought at a charity shop last year (gawd knows why). 2. Scissors/Stamp cutter. I already have a circle and heart cutter from HobbyCraft, but you could just use scissors to cut whatever shape you like. I suggest using a template for accuracy though.
3. Ribbon or string cut to whatever length you want your garland (remember to leave a little bit at each end to loop or hook.
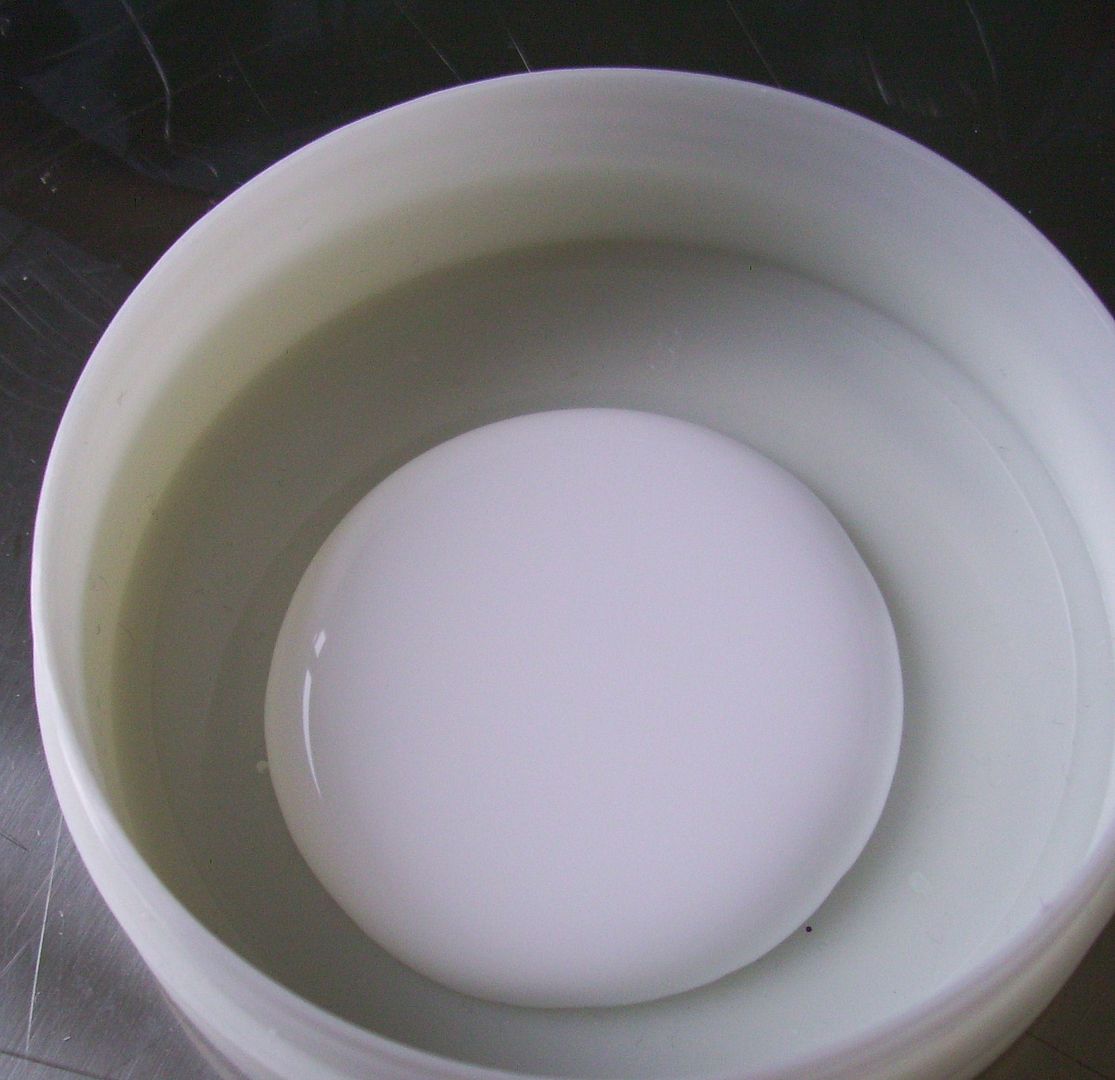
4. Glue. I used kiddy type PVA, just because that's what I found first :)
5. Gems/Glitter/Embellishments. This is optional. I used hot pink crystals. Ohh yeeaah.

Photobucket

Cut/stamp out your shapes. I went for circle and then heart alternatively. Next time I'll do just hearts but you live and learn.

Photobucket

Squeeze out your glue into something. That pot is an old nailvarnish wipe pot. You seeeee crafts and cosmetics go hand in hand. Ho ho.

Photobucket

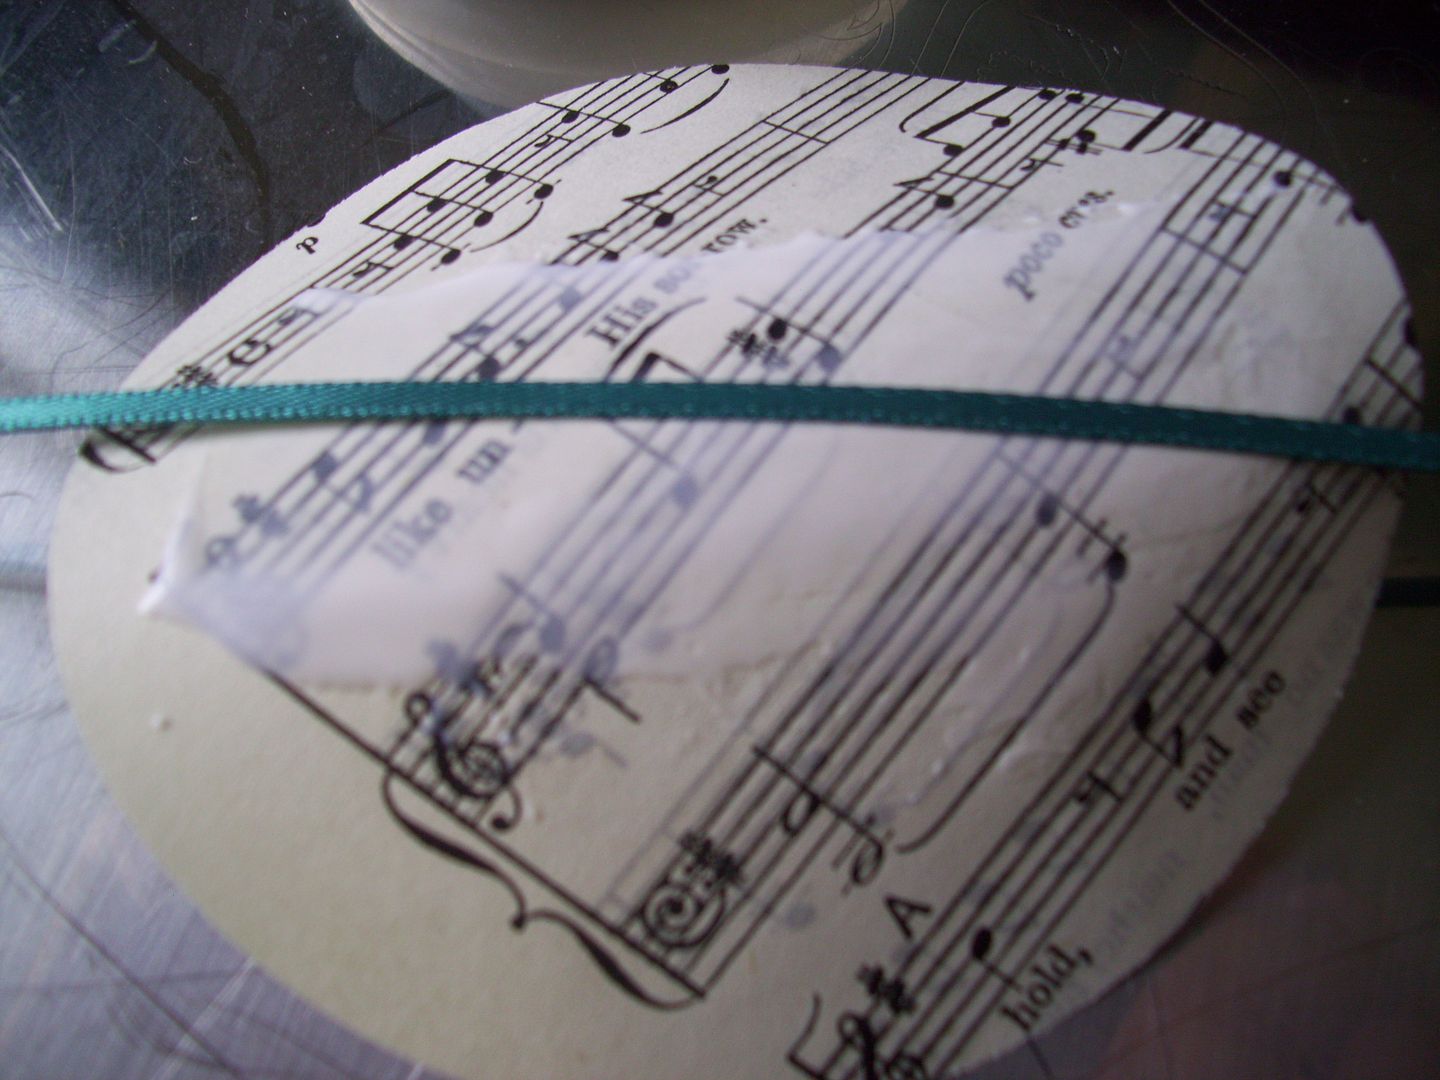
On one side schmear (mm love that word sscchhmmeeaarr) you glue and lay the ribbon/string on it. Then, take another shape of the exact same size and lay it on top, to make a ribbon/strong sandwich if you will.

Photobucket

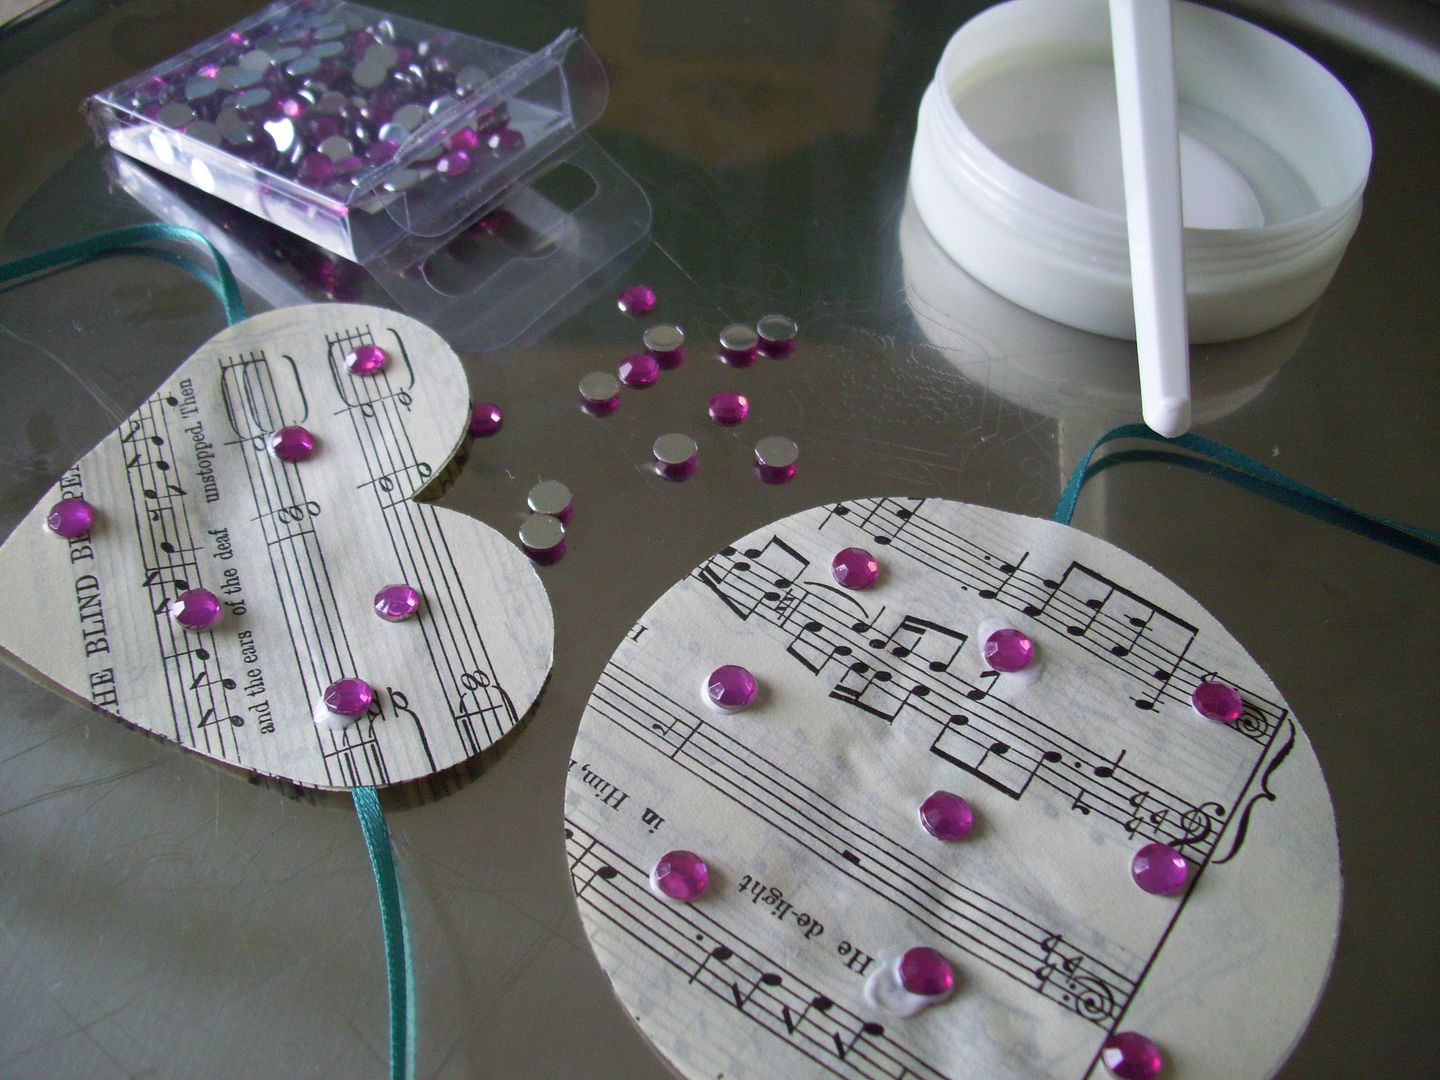
To add a bit of festive sparkle, embellish however you fancy. I stuck on little gems. I used the end of a plastic fork to splot the glue on so that I could make a small gem sized blob and prevent a glue related nightmare!

Photobucket

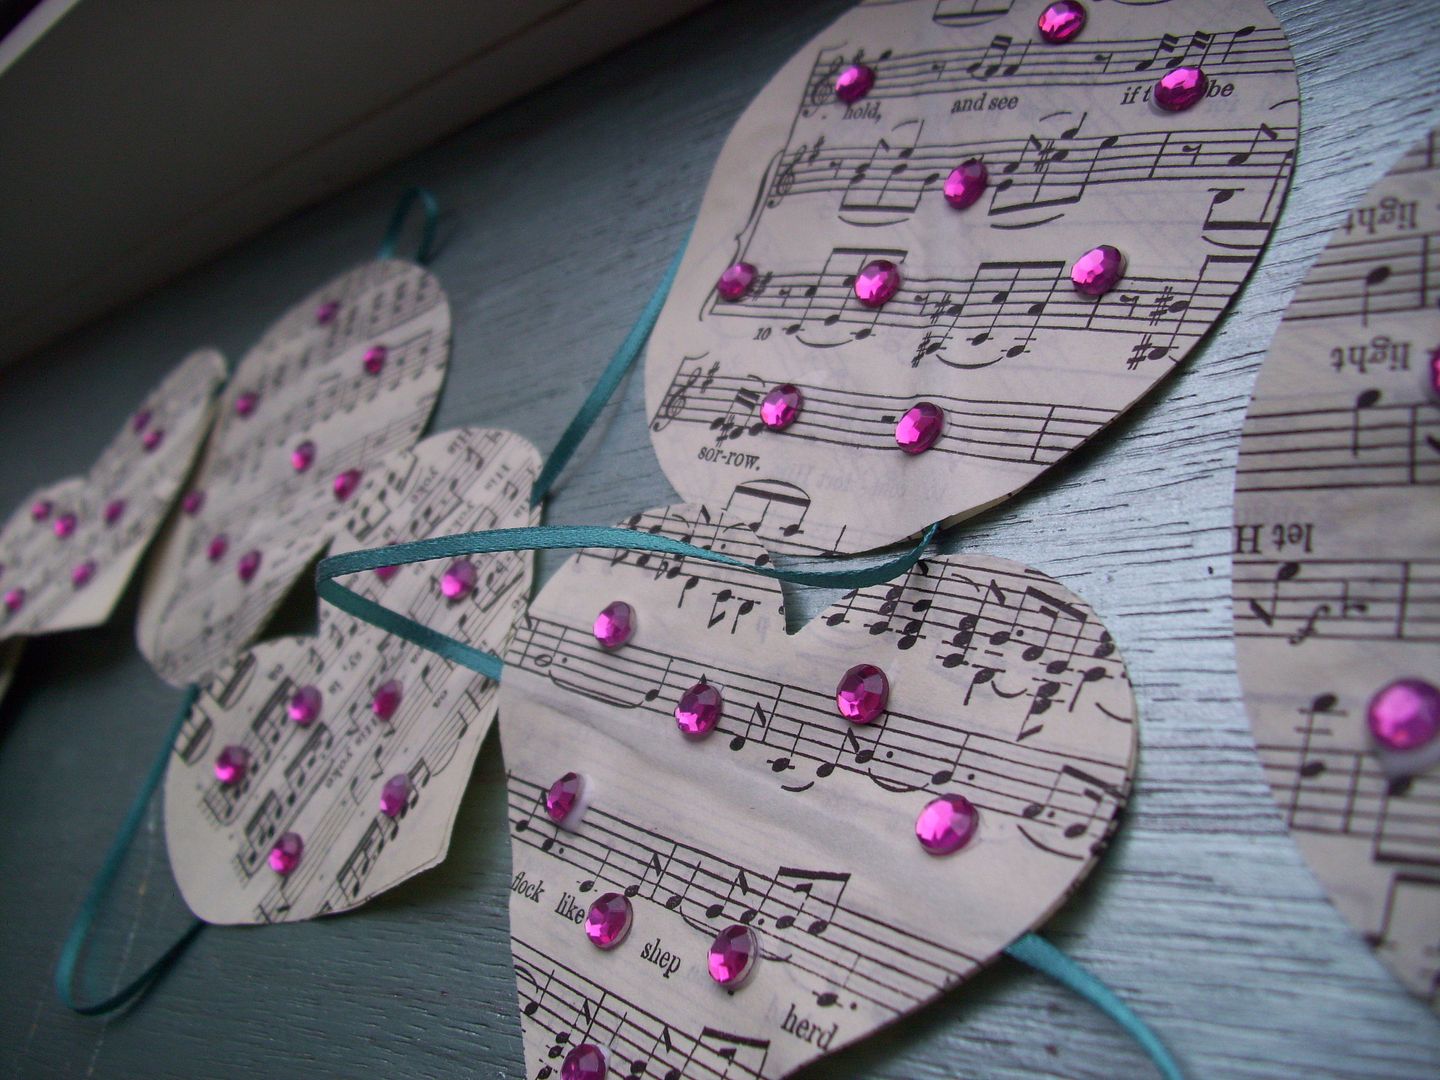
Leave to dry and voila, a very unique garland that you can hang from the tree, mantelpiece, banister or wherever you fancy. You could also adapt this for other occasions- pink hearts on red ribbon for Valentines, orange pumpkin shapes on green ribbon for Halloween etc. I may even make some for the nursery in girly shapes and colours of boyish ones. It's a nice easy project that you need very little for. Super.

If you would like to buy a kit for £3.50 (inc P&P anywhere) pop your paypal email in the comment box and I will send it out to you. Kit will include 32 hearts or circles or a mixtures (please specify) which is enough for 16 shapes on the garland, 100 crystals in clear (which is enough for 6-7 on each shape) and 125cm of fairy pink wrapping ribbon (you know like the type you can curl). All you'd need to sort out yourself is your glue, and voila- Your Own Chic Garland Project Kit :)

What do you think? Is this something you might try?

Toodlepip!

xx

Monday, 1 November 2010

Walking in a Winter Wonderland

Aloha Bloggerinos,

Do excuse the title and unrelated images, I'm just in that merry wintery christmas kinda mood- oohhhh yeeaahhh :)

As you may have noticed, I have been a bit slack on the old blog front of late, so I thought I would fill you in and give you a bit of a chatty post, as these seem to be rather popular. I luurvvvee chatty posts because I feel like I'm off loading my thoughts and find it really theraputic.

Photobucket
(I want trot through here in a nice dress and heels. Mmmm heels, the bump puts paid to any thoughts of sexy high shoes nowadays. Roll on March!)
Well, in the last week or so I have been tres busy. I signed up to a recruitment agency because the job search was going nowhere. They send me on various assignments and my most recent has been at a very well known cosmetic surgery clinic. It's a lovely place, very swish and my main roll (brace yourself) is to label the pictures of ladies boobies, before and after the surgery!! Basically, every man's dream job. Mwahaha.
I've also been temping at my Dad's office, which involved phoning around various international holiday resorts and taking a few details. Out of about 100 calls, I found the American's the best and luurvveedd how they all wished me a good day. I know it's not sincere but I do wish us Brits could share the love a bit. What do you think?

Photobucket
(J'adore wrapping presents and making gorgeous Christmas cards. Pretty pretty)
In pregnancy news I am officially five months pregnant now and blooming! I have a full on bump and am thouroughly enjoying maternity jeans. I am seriously questioning why I have spent my life agonising over jeans shopping, when I could have just bought these beauties and been done with it. Sod dignity, I'm NEVER leaving the bliss of stretchy waist bands. NEVER!!

I can feel him (I think it's a boy) moving about and have had a few light kicks which feels amazing. My scan is this Friday and providing bambino is laying in the correct position, we will see if it has a winky or fairy and can get cracking on painting the nursery- wahoo!!

Being as I'm not working full time, I have found myself rich in time but poor in mula, so this Christmas will be handcrafted as much as possible. I have some super ideas up my sleeve and will be giving you a few tutorials on how to do these too. None of them will be difficult so you will all be able to give them a whirl!

Photobucket
(I want to sit here -on a waterproof somethingorother- and drink hot chocolate and smooch Matt. Tehe)
Our lounge is finally, after 18 months, decorated so I have a "Home Corners" planned for you.

I am love love bloomin' well loving the wintery feel nowadays. I live for this time of year and will literally die with joy if it snows!! There's nothing better than being ll cosy in doors, eating chocolate and snuggling the cat.

I haven't taken any snaps in about 50 years, but I promise I will get cracking and and whip up some homey and crafty posts for you, unless you have any other requests?

Let me know how you're getting on, I love hearing from you all.

Toodlepip!

xx

All images from www.weheartit.com

Saturday, 24 July 2010

Sew Hard! Grr!

Aloha Bloggerinos,

I'm trying to make this bag that I bought a pattern for from John Lewis. Now, when it says "easy", what it actually means is "really confusing and difficult and not something you can do in an afternoon".

I decided that the instructions were too hard and perhaps if I left them on the floor and came back to them it would be easier. I was wrong.

Grrrr back to basic sewing for me then!


Do any of you use sewing patterns?

Toodlepip!

xx

Friday, 23 July 2010

Lou's Lovelies :: Handmade Bracelets

Aloha Bloggerinos,

Since I was little, I have been obsessed with beads. I used to look longingly at my lovely Mum's (now in heaven) jewellery and wish they would break so that I could have all the beads off them. Mental? A little bit.

I would be given those gawdy jewellery making kits filled with candy coloured plastic beads and spend Christmas's and birthday's threading them onto multi coloured strings.

I love beads so much, I even took a 36 week Beading Course for seed beads and can actually stitch in them- this is commitment I tell ya!

So anyway, these little beauties are available for you to have sent through the fairy post and into your hands...and onto your wrists!

Paypal only, just comment which one you would like and I will send an invoice. No returns.

As always, first come, first serve.

P&P UK- £1.
P&P Other - £3.


Silver Moon : : £3.90  - SOLD TO SHADOW


Glacier Mists : : £3.90


Little Bow Blue : : £3.90


Lady Sage : : £3.90


Emerald Goddess : : £3.90


Exotic Sands : : £3.90


Do you likey likey?

Toodlepip!

xx
 photo older.jpg  photo homebot.jpg